


Geonection is a location-sharing app that allows you to create a group to share live or historical locations among friends and family in the group. Family or friends in the group would know exactly where they are and make sure they are safe.
1. How to install and register Geonection?
First of all, download Geonection app from the official website or app store and install it on your cell phone. Then after entering the app, you need to register an account, however, if you already have an account with Wondershare products, you can log in directly.

After completing the registration and logging into the app, the app will prompt you to get permission to access the location information of your phone. Your locations shared to friends and family are end-to-end encrypted. No one outside of your Circle, not even Geonection will know them.

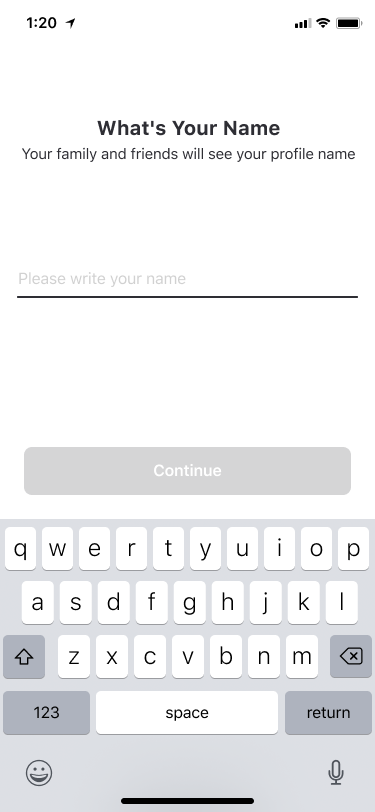
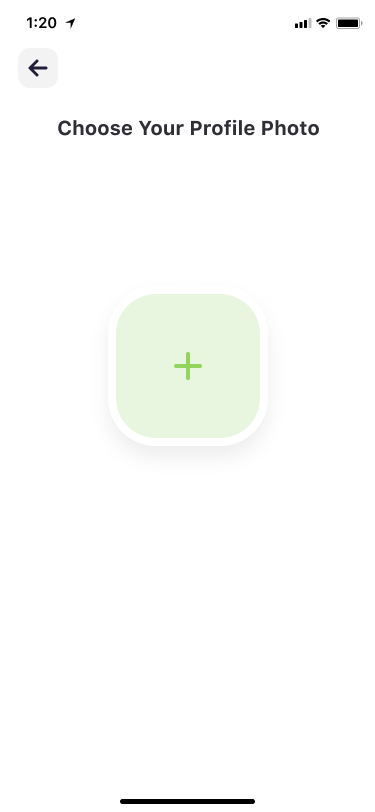
After that, you need to set an avatar and nickname for your account. Here, you can start using Geonection app.
2. How to share location and view shared location?
Before you can share or view location info among your friends or family, you need to create a Circle. In Geonection, Circle is a function similar to a group. You can create different Circles to share your location information with different people.
2.1 How to create a Circle?
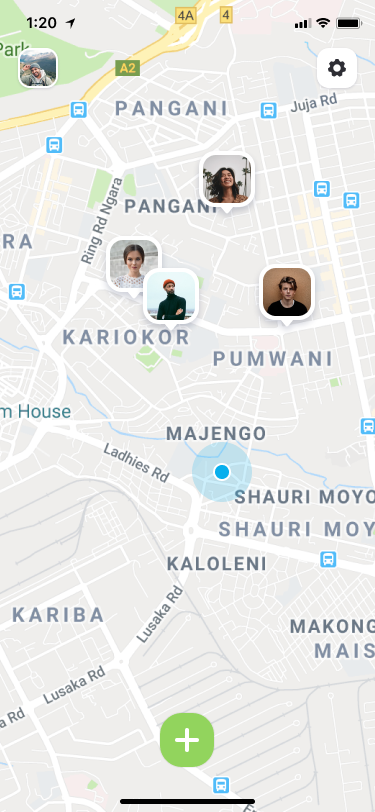
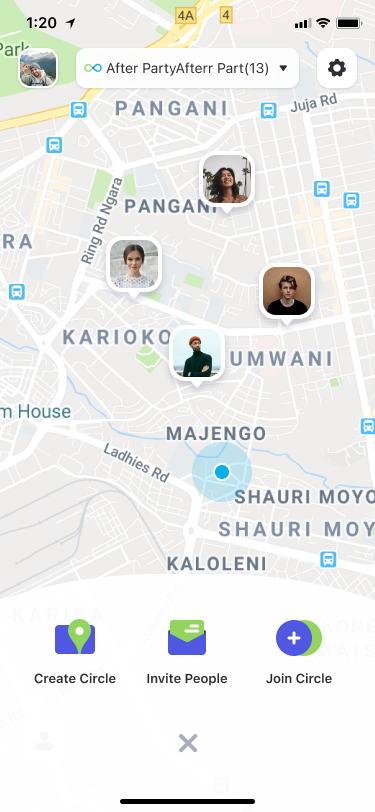
First, tap the plus button on the main screen, then in the pop-up pane below, you can choose to create a Circle or join an existing Circle.

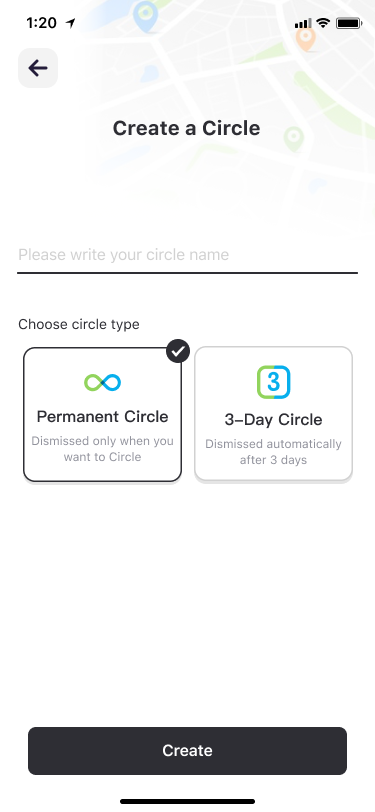
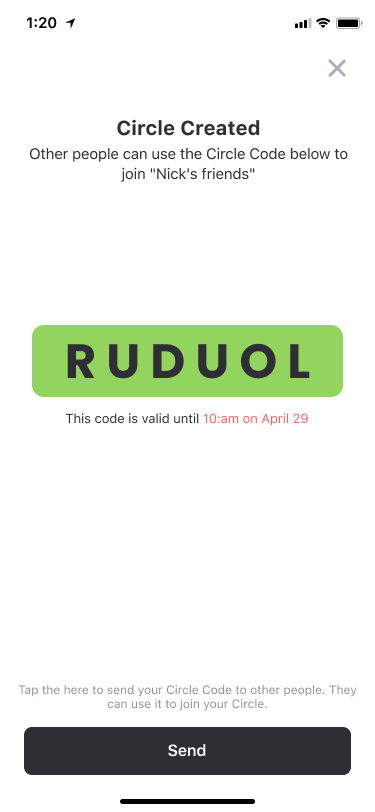
After tapping Create Circle, you will go to the next screen. Here you can choose to create a permanent Circle or a Circle that will expire in 3 days. Then you can name the Circle, and finally tap the Create button. The next screen will show you a unique Circle code that you can share with your friends or family by tapping the Send button.
2.2 How to join a Circle?
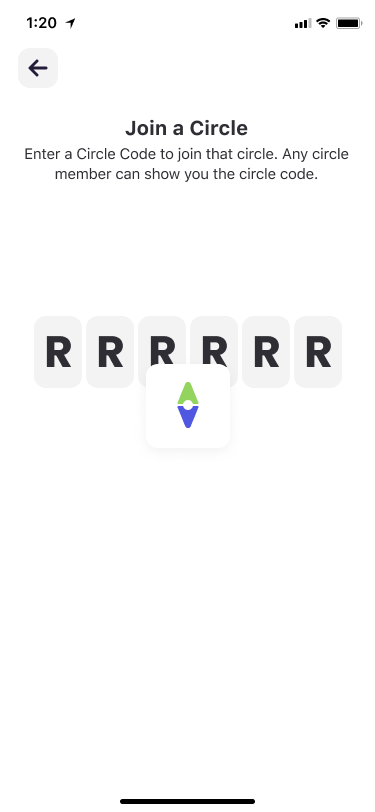
Tap Join Circle button and on the next screen, you need to enter a Circle code, which is a 6-digit number or letter that your friend shared with you. In addition, by tapping the directory button in the upper right corner of the interface, you can see all Circles that waiting for the admin’s confirmation to join.

2.3 How to manage Circles?
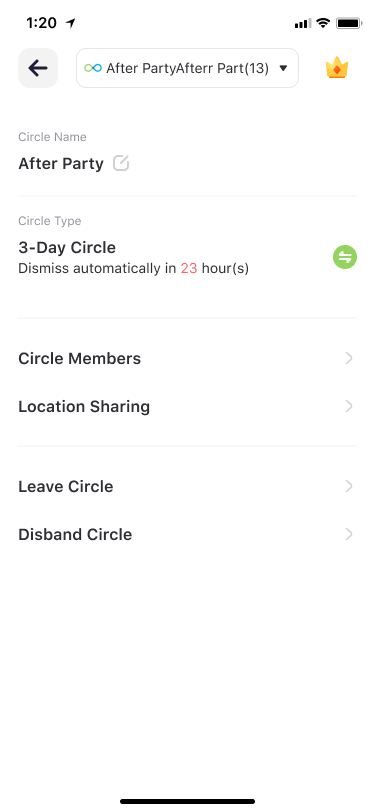
By tapping the gear button at the top upper, you can change the Circle name, view the Circle type, manage the Circle members, hide your location or share your precise or approximate location, and leave or delete the Circle.
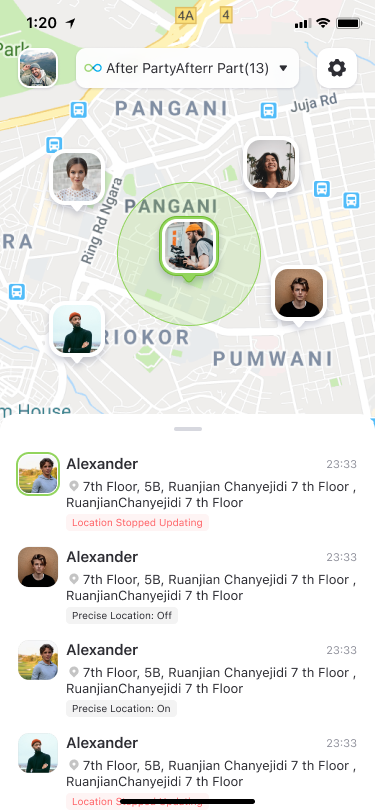
2.4 How to view shared location?
After creating or entering a Circle, you can see the name of the current Circle at the top of the main interface, and you can find all the Circles if tapping the Circle drop-down box.

3. How to set up or quit my account?
Tap the top left corner of the main interface, you will enter the account management interface. Here you can change your account avatar, view the app's service descriptions, or log out of your account.

4. How to allow Geonection to run in the background on Android devices?
For some Android devices, you need to turn on the background running permissions for Geonection to work. Here, we introduce how to open the background running permissions on Huawei and Vivo devices.4.1 How to turn on background running permissions on Huawei devices?
Step 1: Open the setting menu, use the search bar above and search for "App lunch", then tap it.
Step 1.1: By tapping "App lunch", you may enter the battery setting page based on the system version. Find "App lunch" and tap it.

Step 2: You will find that Geonection is on by default. Turn it off to stop "manage automatically".
Step 3: By turning it off, a pop-up window with 3 options will show up. Then, turn on all three options (Auto-lunch, Secondary lunch, and Run in the background) and tap OK.
Step 4: Now Geonection can run in the background on Huawei devices.

4.2 How to turn on background running permissions on Vivo devices?
For Vivo devices, you need to turn on both the “Autostart” and “High background power consumption” permissions. Please follow 4.2.1 and 4.2.2 to open the background running permissions.
4.2.1 How to turn on Autostart permission?
Step 1: In the setting menu, search for "Autostart" and tap it.Or, go to "More Settings" and then "Permission Management"


4.2.2 How to turn on High background power consumption permission on Vivo devices
Step 1: In the setting menu, use the search bar above and search for "High background power consumption", then tap it.Or, find the "Battery" option in the menu, and then tap "High background power consumption" on the Battery page.

Step 2: Here Geonection is off by default. Turn it on and the setting is done.
Step 3: Now Geonection can run in the background on Vivo devices.
