

Do you want to limit your children’s screen time on a Mac device? Would you like to set up downtime and restrict their access to specific apps and websites?
Use Mac parental controls to enjoy much-needed peace of mind while helping your kids build healthy digital habits. These features also let you remotely control Mac accounts with enabled parental settings.
However, MacBook parental controls aren’t perfect. Before exploring a better alternative, let’s see what they offer and how to set them up.
Table of Content
Mac parental controls are features for limiting screen time, restricting access to specific content (e.g., apps, websites, movies, TV shows, and music videos), and staying on top of children’s online activities.
Additionally, you can control a Mac from iPhone, iPad, and iPod Touch devices with Family Sharing. You can restrict iTunes Store, App Store, and Apple Books purchases, remotely control Mac screen time for your kids, and share location and content (e.g., subscriptions, music, photos, files, etc.).
Important: The Parental Controls on Mac feature is no longer available. Apple replaced it with Screen Time in macOS Catalina and all subsequent versions (Big Sur, Monterey, and Ventura). However, they have retained all the functionalities, with slight interface changes for a more seamless experience.

MacBook parental controls give you peace of mind. You can set them on any Mac to remotely control what websites your children visit, how much time they spend on a computer, and what apps they use after downtime (if any).
You can ensure they don’t play games late at night, access age-inappropriate or potentially harmful content, or use social media when studying or doing homework.
All of that helps your children develop healthy digital habits. It’s not about restricting access to everything online. It’s about teaching kids to strike a balance while eliminating exposure to harmful content.
Whether your child has a Mac device or shares one with you, you must use your administrator account to set up a standard one with parental controls. Otherwise, they can change the settings and get past your usage limits.
Create a Child Account
Follow these steps to create a child account with parental controls on a Mac:
- Step 1: Log into your administrator account on your child’s Mac or a shared device.
- Step 2: Go to the Apple menu > System Preferences (System Settings on macOS Ventura) > Users & Groups.
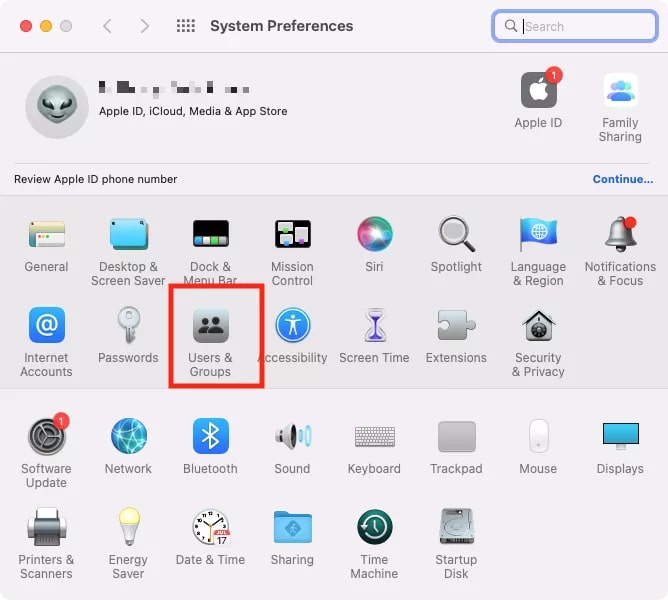
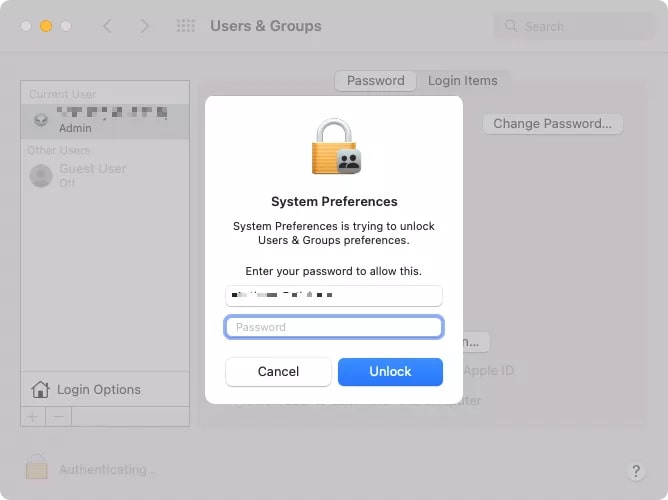
- Step 3: Select your admin account in the left sidebar and click the lock icon.
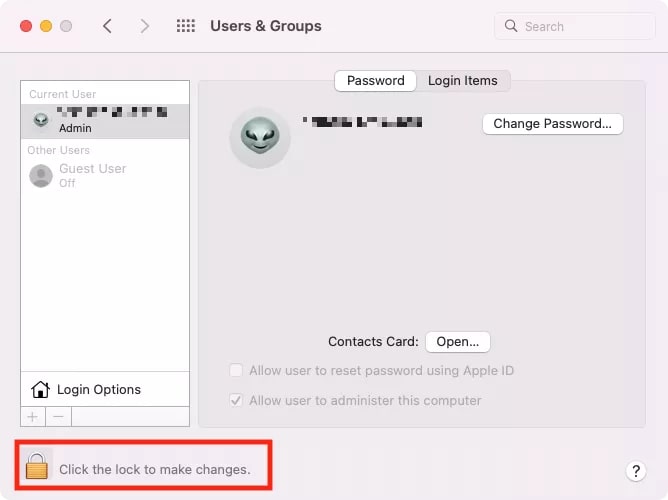
- Step 4: Enter your admin username and password and click Unlock.
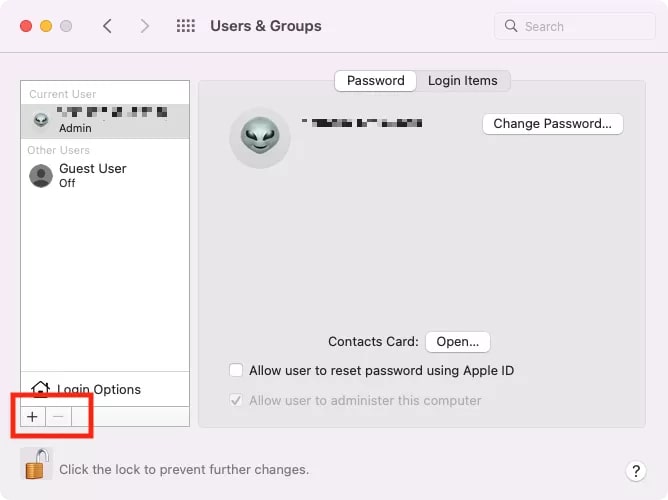
- Step 5: Click the plus icon to add a new user.
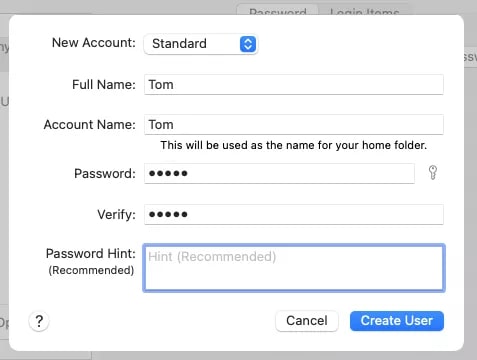
- Step 6: Choose Standard in the New Account drop-down list, type your child’s name, create a password, and click Create User.
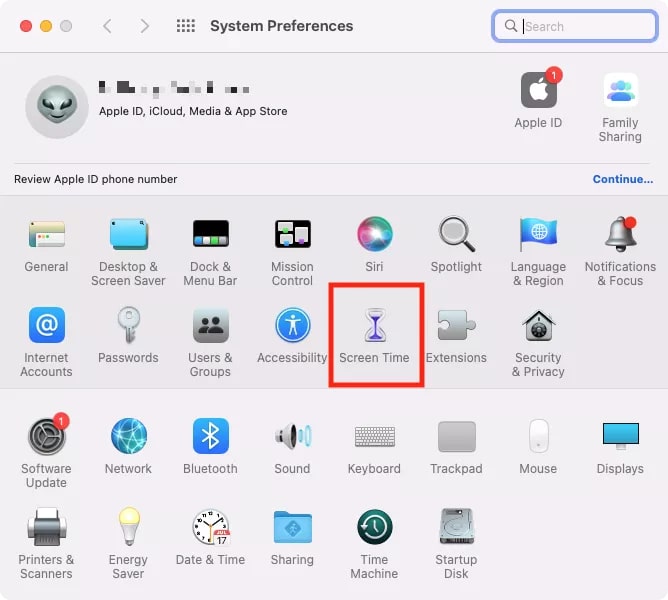
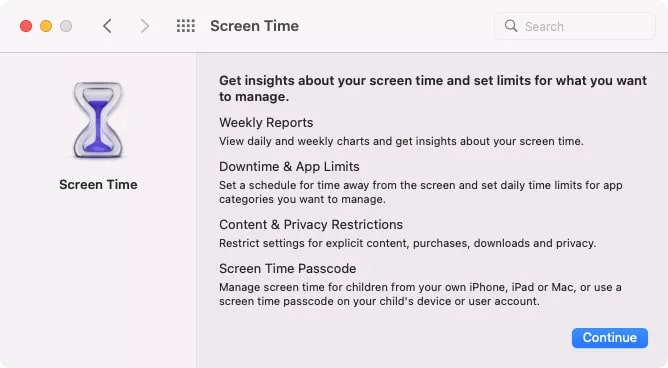
- Step 7: Go to System Preferences > Screen Time to enable parental controls on that Mac.
- Step 8: Click Continue.
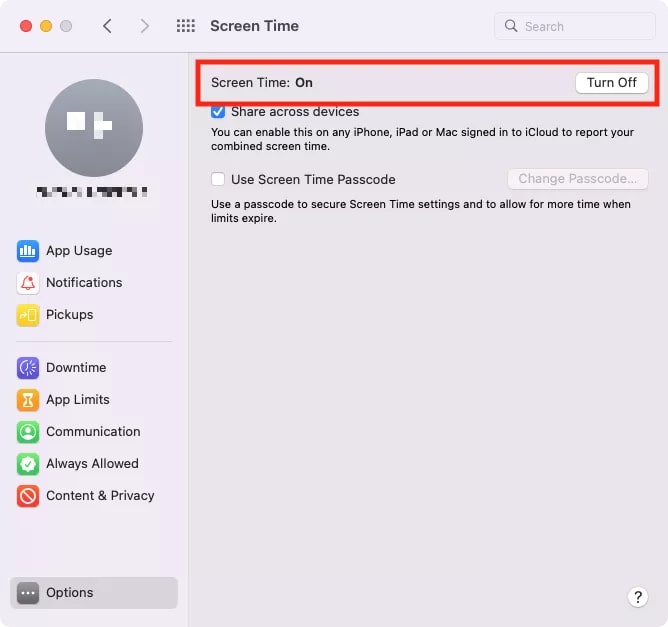
- Step 9: Select Options in the left sidebar and click Turn On (toggle on the Screen Time switch on macOS Ventura). You can also tick the Share across devices checkbox to enable screen time on other macOS or iOS devices. macOS Ventura added the Include website data feature for details on visited sites (available only with Family Sharing).
- Step 10: Restart the Mac device, sign out of your administrator account, and log into the one you’ve created for your child.
- Step 11: Go to System Preferences > Screen Time > Options and enable the Use Screen Time Passcode feature.
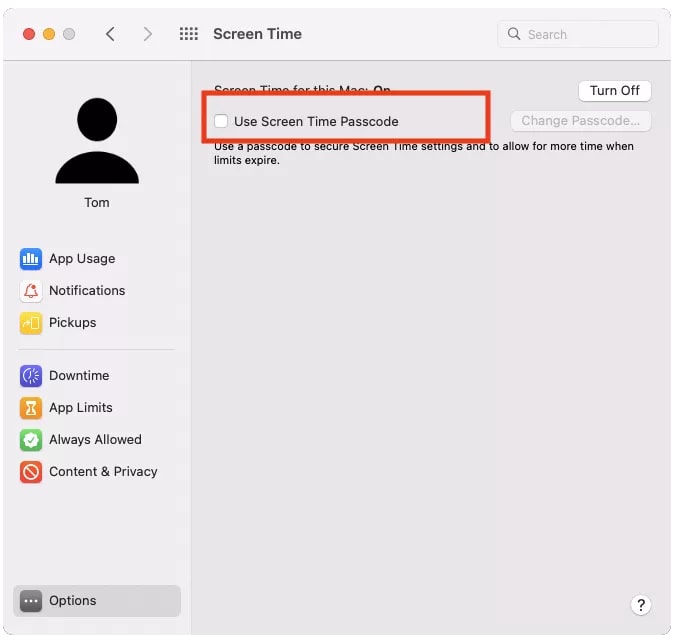
- Step 12: Set a four-digit passcode to prevent your child from changing the settings, and add your Apple ID for passcode recovery.
After setting up a child account, you can enable Family Sharing.
Set Up Family Sharing
Here’s how to set up Family Sharing for Mac remote control:
- Step 1: Go to System Preferences, sign in with your Apple ID, and click Family Sharing > Get Started. (System Settings > Family > Set Up Family on macOS Ventura).
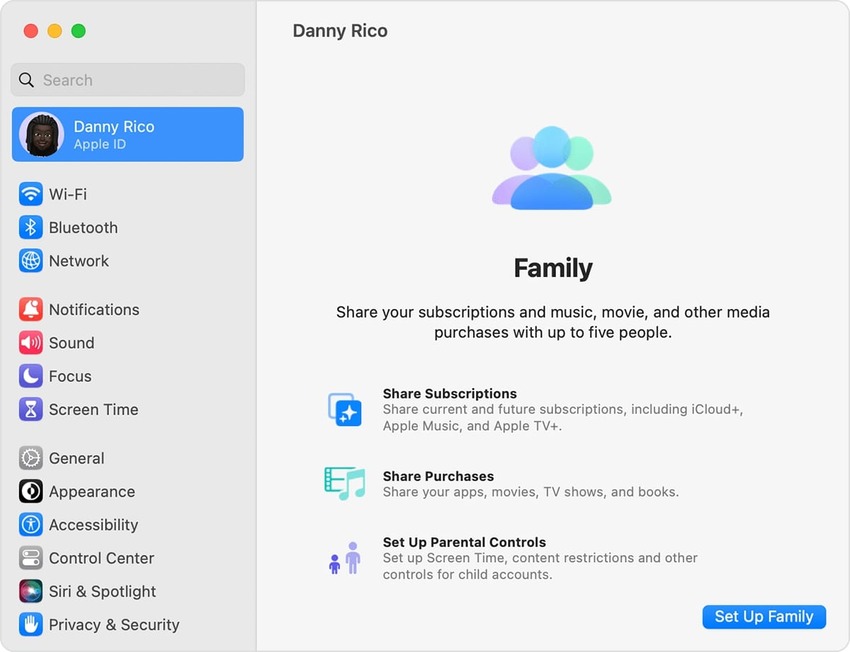
- Step 2: Click Add Member, Add Family Member, Invite People, or the plus icon (depending on your macOS version) to set up a family group.
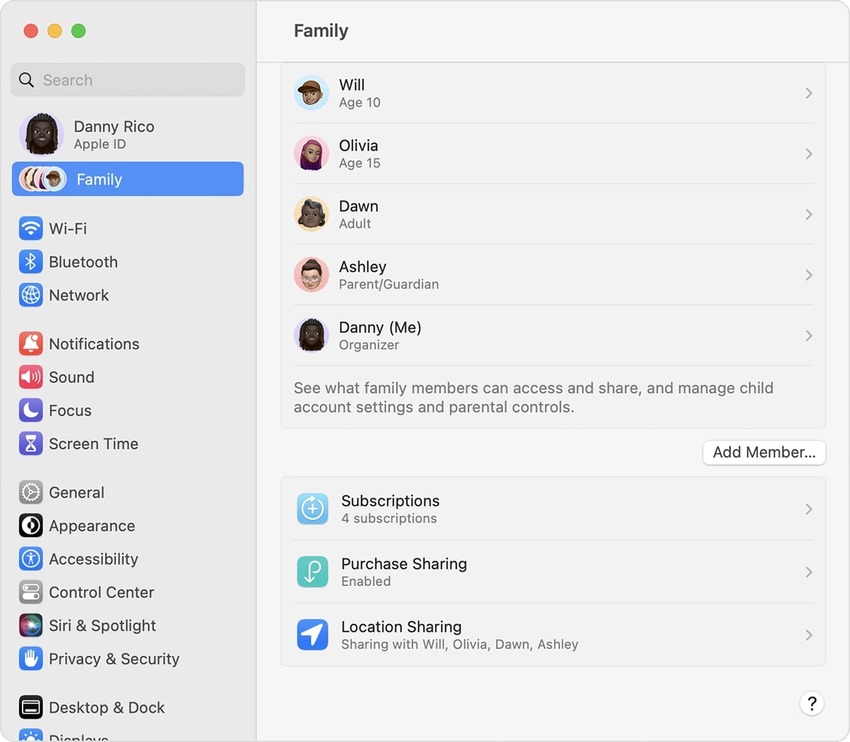
Once the family members accept the invitation, you can share subscriptions, purchases, content, and location and remotely control Mac accounts with parental controls.
Additionally, you can enable the Ask To Buy feature (available in the left sidebar when you select a child account) so children in your family group can’t purchase or download anything from the App Store, Apple Books, or iTunes Store without your approval.
Adjusting Parental Controls With Family Sharing
If you’ve enabled Family Sharing to use your iPad, iPod Touch, or iPhone to control Mac accounts with enabled parental controls, follow these steps to adjust screen time usage and limits:
- Step 1: Sign into your Mac admin, access Screen Time from System Preferences or System Settings, and log in with your Apple ID.
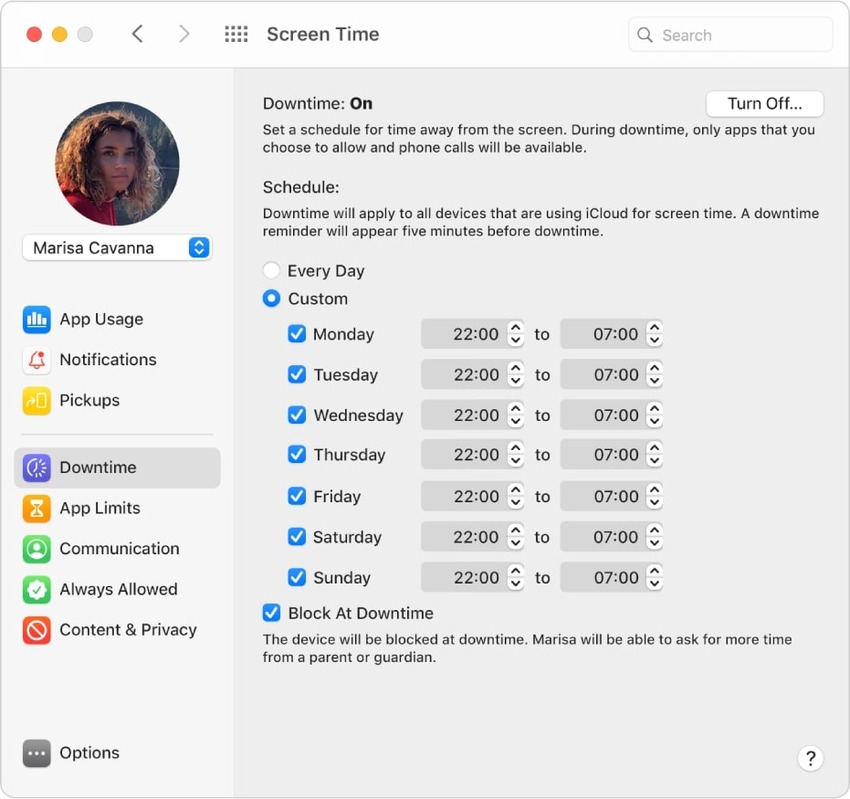
- Step 2: Select a child account from your Family Sharing group and choose Downtime in the left sidebar to schedule time away from the computer.
- Step 3: Enable the feature by clicking Turn On or toggling the switch (depending on your macOS).
- Step 4: Set the desired downtime period under Every Day or click Custom to specify different times for each weekday. Enabling the Block at Downtime option will prevent your child from using their Mac at downtime.
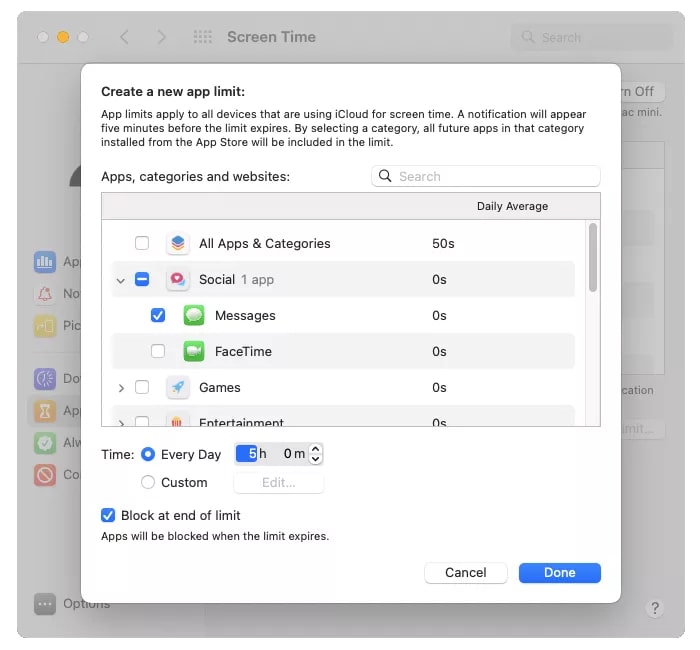
- Step 5: Go to App Limits and enable the feature to manage your child’s app usage. It applies to all devices using iCloud for screen time.
- Step 6: Click the plus icon to add a new app limit.

- Step 7: Select categories or individual apps (installed from the App Store) and websites and set daily limits for each. Enable the option to block usage afterward so your child can’t click Remind Me in 15 Minutes or Ignore Limit for Today. They can only add another minute or request your approval for more time. Remember that app limits expire at midnight.
- Step 8: Select Communication in the left sidebar and choose whom your child can call or text during screen time and downtime (applicable only to Messages, Phone, iCloud, and FaceTime contacts).
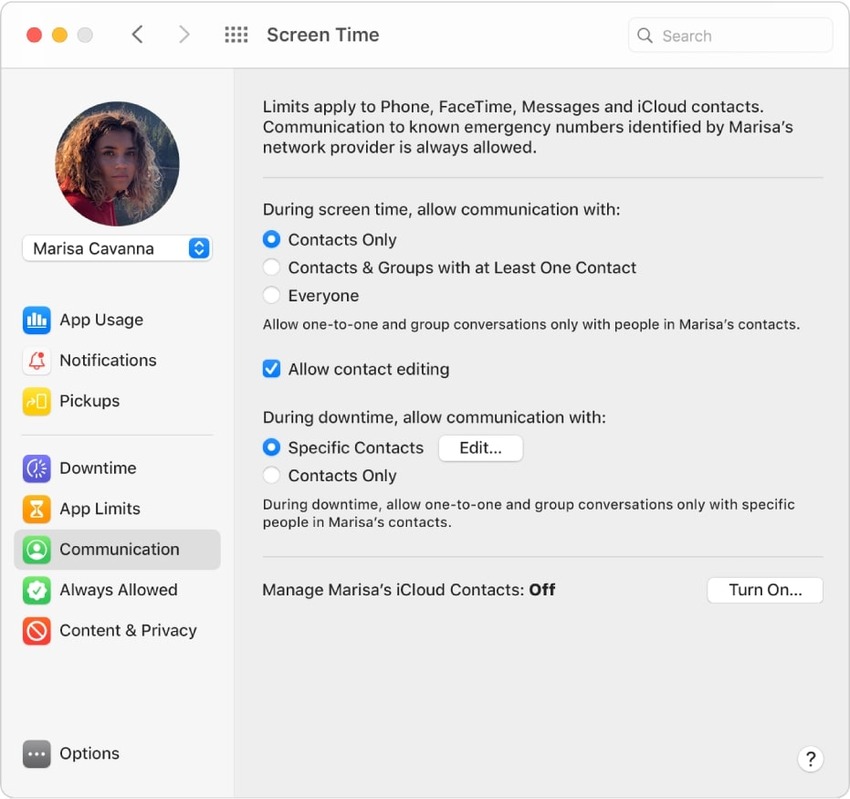
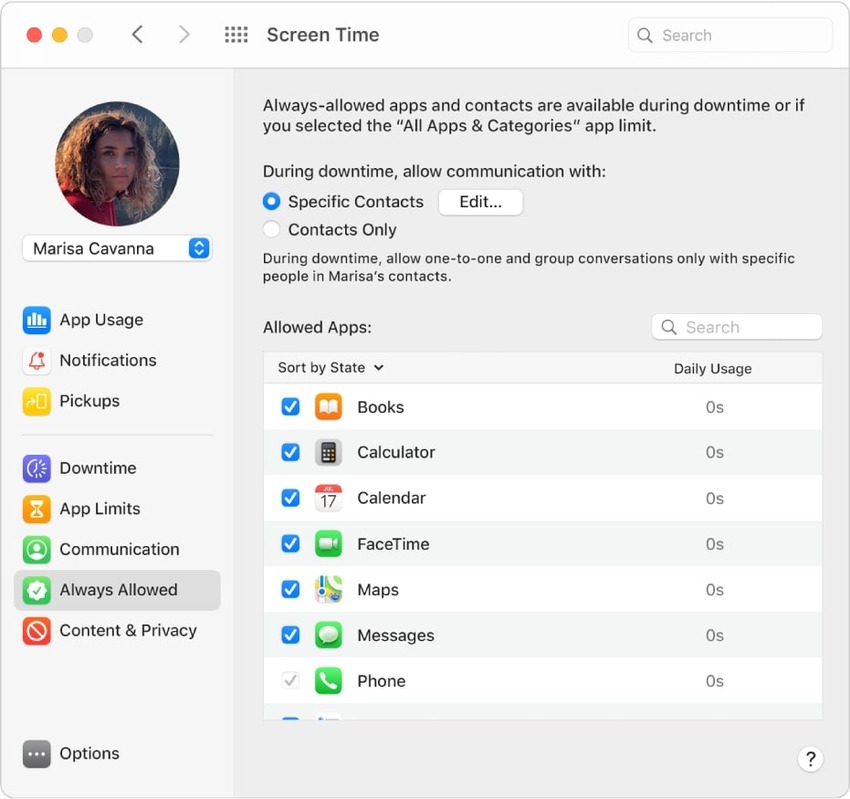
- Step 9: Go to Always Allowed to select apps your child can use and friends they can contact during downtime.
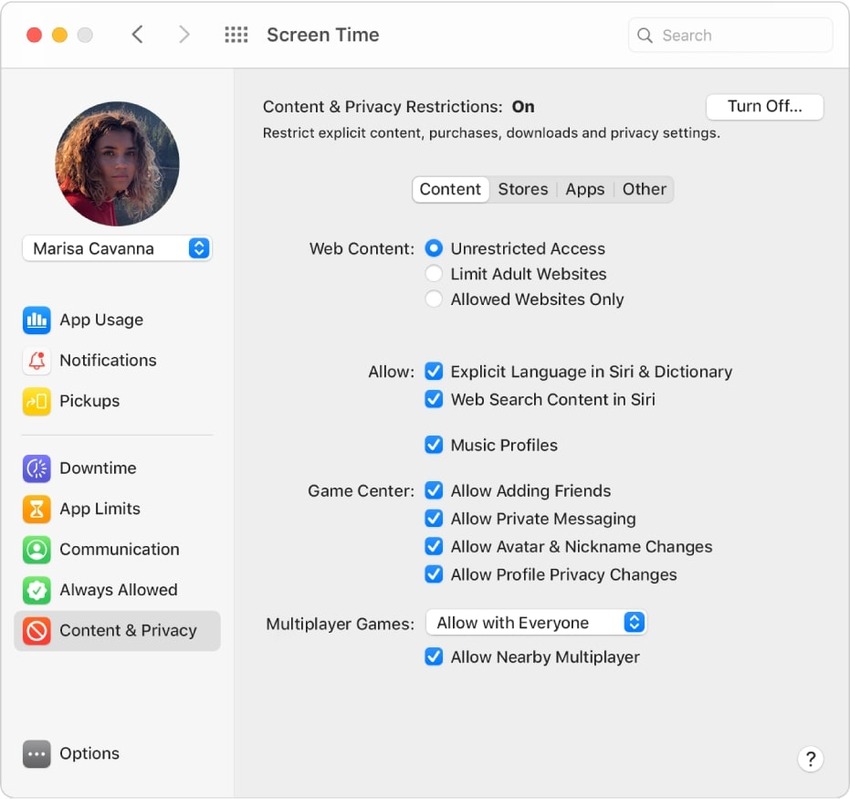
- Step 10: Select Content & Privacy in the left sidebar, click Turn On (or toggle the switch) to enable restrictions, and specify them for web content, purchases, and apps. You can limit adult websites, add allowed and blocked sites, prevent explicit language and web searches in Siri, control the Game Center, restrict purchases and downloads, and block specific apps and macOS features. Additionally, you can lock account and passcode changes in the Other tab.
Adjusting Parental Controls Without Family Sharing
Here’s how to adjust parental controls on a Mac if you don’t use Family Sharing:
- Step 1: Log into your child’s account on their Mac device or the one you share.
- Step 2: Access Screen Time from System Preferences or System Settings.
- Step 3: Follow the steps above to schedule downtime, set app and communication limits, specify always-allowed apps and contacts (if any), and add content and privacy restrictions.
Don’t worry – your child can’t change the settings without your passcode.
Parents must have access to their children’s Mac devices to set up accounts with parental controls. That’s a considerable disadvantage – primarily when having teenagers who know their way around technology.
Although you can prevent your kids from changing the password and settings, that doesn’t stop them from creating a new account without parental control restrictions.
Additionally, your children must accept your family invitation to let you utilize Family Sharing for Mac remote control.
Another drawback of MacBook parental controls is no detailed activity report. You can only see combined and individual daily usage (hours and minutes) for categories, apps, and websites.
Even with all the restrictions, your children might access potentially harmful content – and you’ll be none the wiser. For instance, you can’t see their browser history and other online activity or filter all websites with age-inappropriate content.
That’s why we recommend an alternative – Wondershare FamiSafe.
Wondershare FamiSafe is an award-winning parental control app for Mac, Windows, iPhone, iPad, Kindle Fire, Chromebook, and Android. Suitable for children of all ages, it helps parents control screen time, block age-inappropriate or harmful content (e.g., websites, apps, photos, and videos), and filter web searches.
It lets you check browser history on your children’s devices and track their real-time location. Additionally, you get a detailed activity report with all the visited websites, watched videos, and used apps.
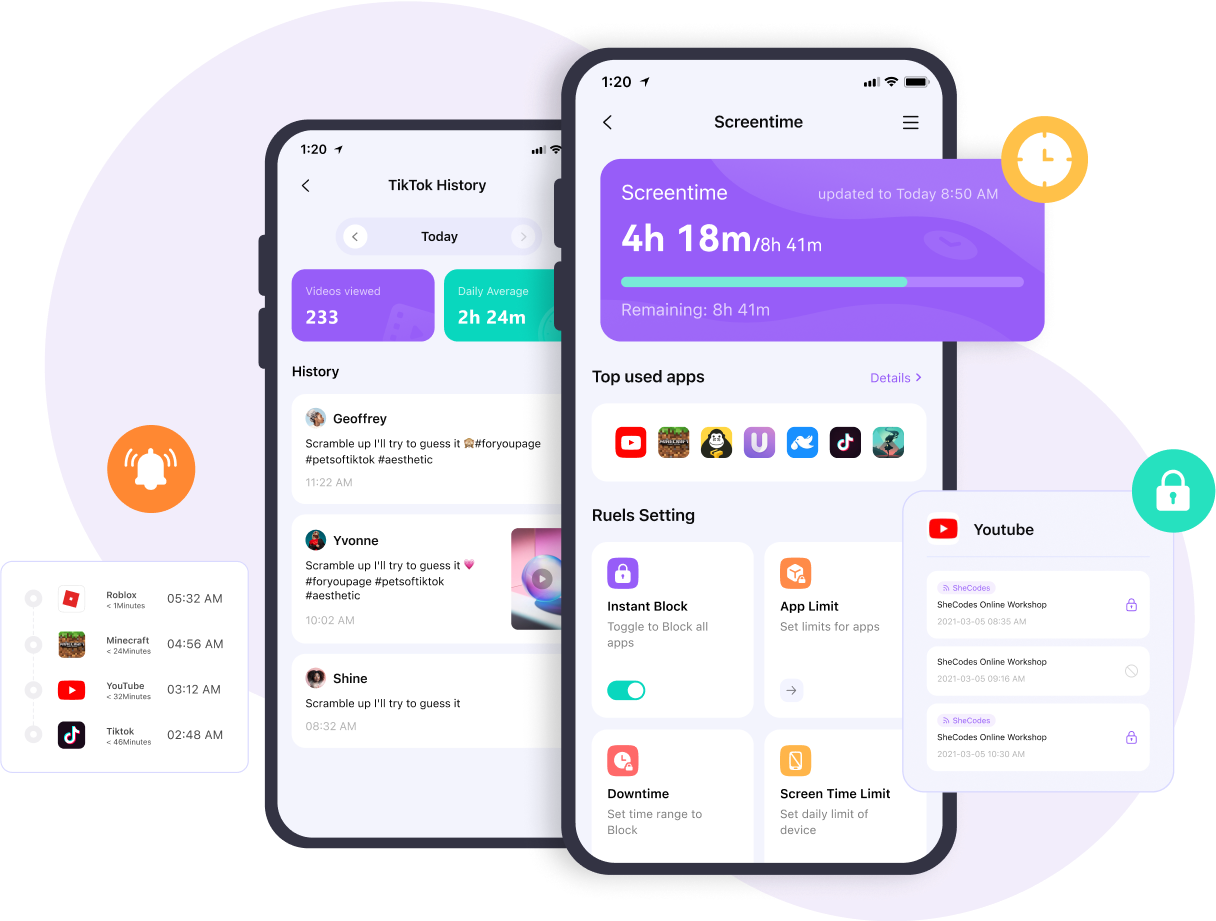
Here are Wondershare FamiSafe’s top features:
- Screen Time Control – Specify time limits for device usage, schedule downtime, and track how much time your kids spend on devices and apps.
- App Blocker – Set time limits and downtime schedules for specific apps or block them entirely and get notifications when your children try to use them.
- Safe Search – Block results in search engines showing inappropriate or harmful information.
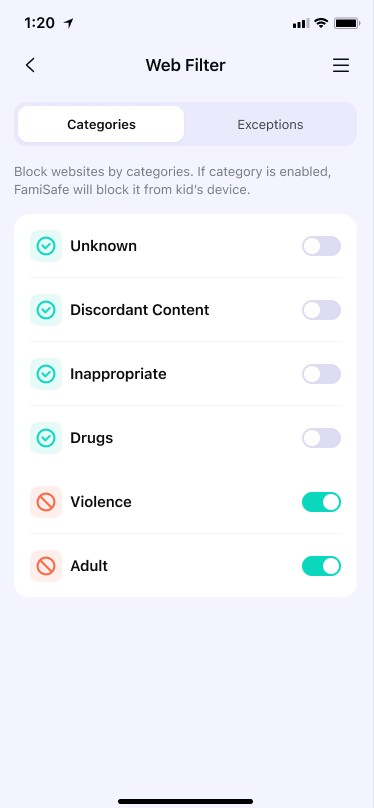
- Web Filtering – Prevent access to websites with explicit content (e.g., showcasing violence, drugs, alcohol, bullying, or sexual activities), and add allowed platforms for a safe online environment.
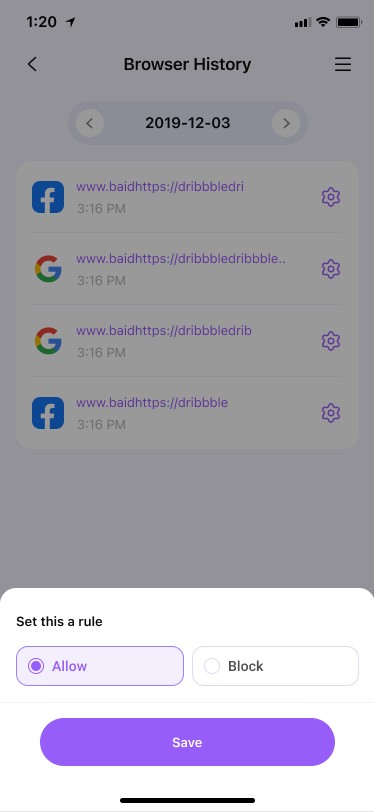
- Browser History – See what content your children look for in search engines and what sites they visit (even in private or incognito mode).
- YouTube Content Detection – Block access to age-inappropriate YouTube videos and set alerts for multiple categories.
- Suspicious Photos Detection – Monitor your children’s devices for explicit photos and get instant alerts.
- Activity Report – Track daily device activity, including visited websites and used, installed, and uninstalled apps.
- Real-Time Location Tracking – Set geofences, get alerts when your kids leave them, view live locations, and check the history of whereabouts.
The best part is you can set rules, limits, and filters remotely. You don’t need a child’s device to adjust the settings, but they do need to install Fammy first.
Setting up parental controls with Wondershare FamiSafe is straightforward, thanks to its intuitive interface. It involves many steps because the app has advanced features, but they’re easy to follow. Here’s what to do:
- Step 1: Download and install Wondershare FamiSafe on your iOS or Android, and log in with your Wondershare ID, Apple ID, Facebook, or Google account.
- Step 2: Download and install Fammy on your child’s device.
- Step 3: Pair the devices by scanning the QR code.
- Step 4: Follow the setup wizard to grant your phone access to the device with Fammy.
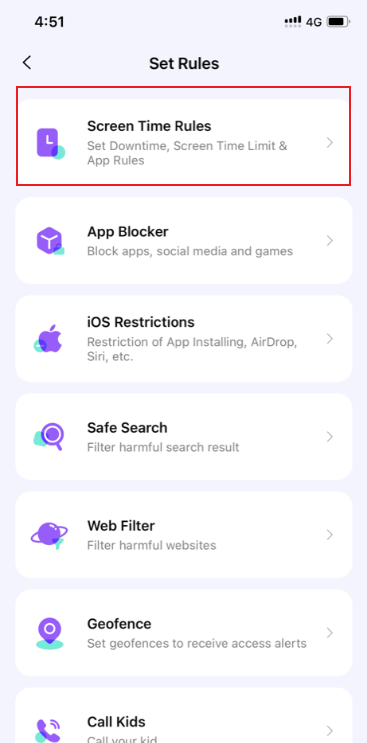
- Step 5: Launch the parental app and go to Set Rules > Screen Time Rules.
- Step 6: Toggle the Instant Block switch to block all apps or select App Limit for individual restrictions.
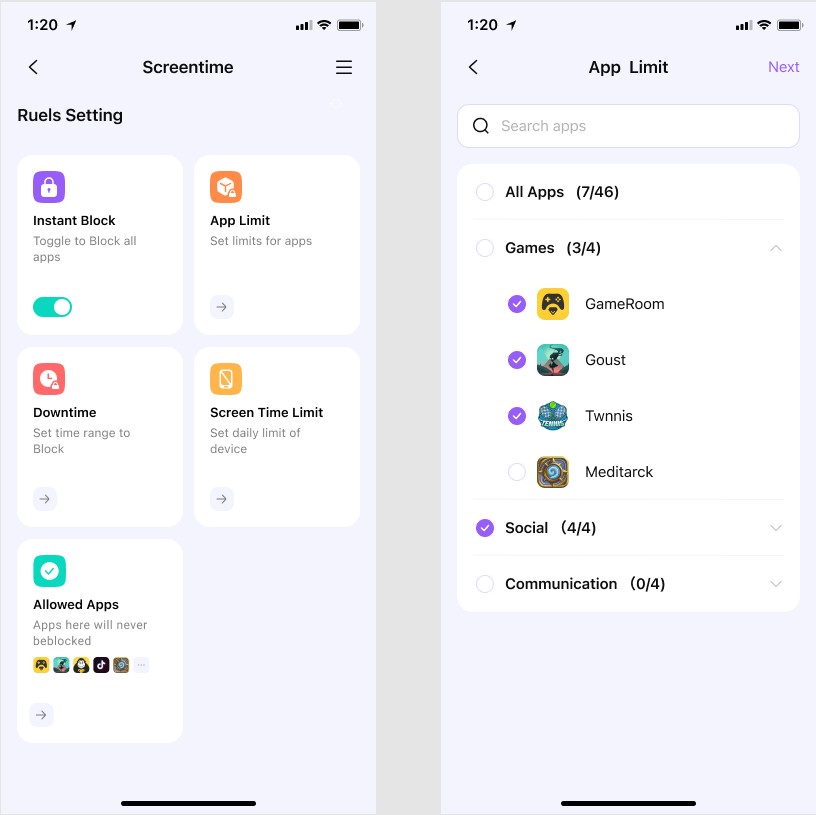
- Step 7: Enable and schedule daily or custom screen time limits.
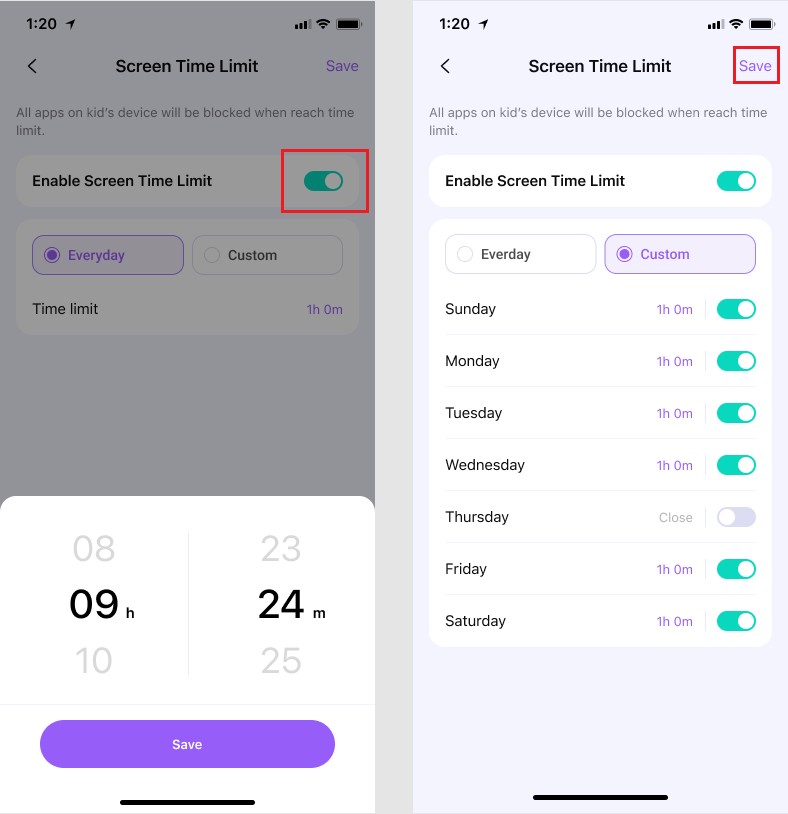
- Step 8: Schedule everyday or custom downtime.

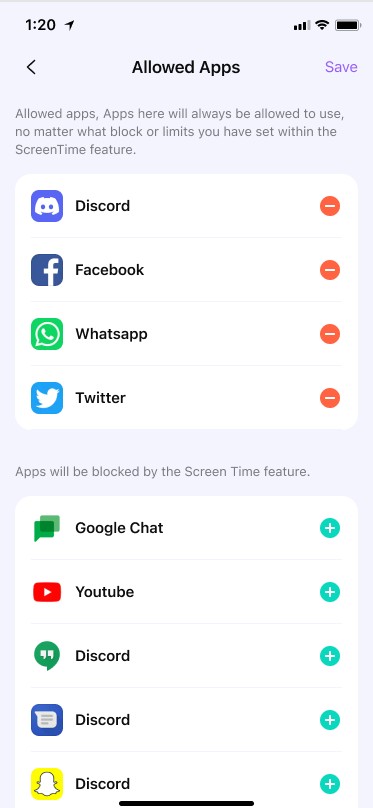
- Step 9: Add allowed apps your child can access even during downtime.
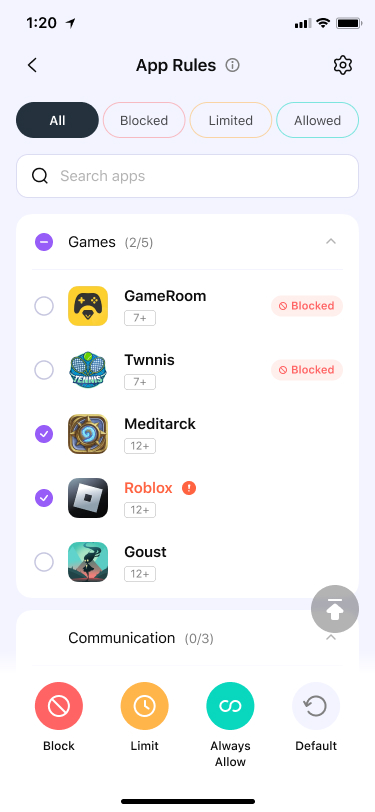
- Step 10: Go to Set Rules > App Blocker to prevent access to specific apps. You can use the age rating and set time limits and restriction schedules.
- Step 11: Enable Safe Search under Set Rules and go to Web Filter > Categories to block websites with inappropriate content. The Exceptions tab lets you allow sites.
Step 12: Return to the main interface, go to Edit Your Statistics > Inappropriate Pictures > Settings, toggle on the switch, and set the accuracy level.

- Step 13: Find the YouTube Content Detection feature in the Statistics, tap Settings, and enable desired categories to receive alerts.

- Step 14: Tap Recent Browser History when selecting your Statistics. Once your child starts using their device with Fammy, you can see their searches and allow or block websites.
As you can see, Wondershare FamiSafe is more intuitive than MacBook parental controls. More importantly, you can adjust the settings from your phone, get instant alerts, and view your child’s entire online activity.
Mac parental controls can help children build healthy digital habits, but the features leave much to be desired. A better alternative like Wondershare FamiSafe fills the gaps, enabling you to remotely control Mac screen time and content access for utter peace of mind.